|
1.) Start out by
removing the glove box. It should take no more than a minute to remove
the glove box out. It's really easy. Once the glove box is removed, go
back to the engine bay. Behind the passenger shock tower you should see
a black rubber grommet. Carefully manipulate your hand in the limited
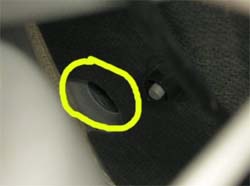
amount of space and push the grommet through the firewall. It should pop
out inside the car. Have someone keep an eye out on the inside to track
the grommet as it pops out. This is what you should see when after the
grommet is pushed into the car.
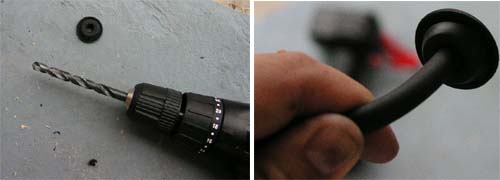
2.) Get the grommet from
inside the car and prep it for the vacuum line. The Defi vac line is
pretty thick in diameter so you will need a large drill bit to make and
enlarge the hole. Work slow and increase the bit size until the proper
clearance is made. Below you will see the line slid into the grommet.
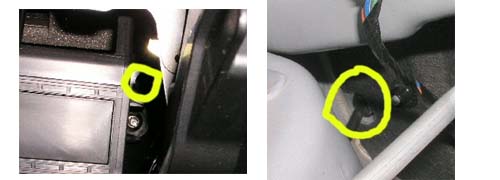
3.) Once the hole is
made into the grommet, I suggest you route the vacuum line for the boost
gauge.
Have someone inside the car feed the line through this hole. The other
person should grasp the line from the engine bay and pull out some line.
Below you can see the line through the firewall with the grommet put
back in. The grommet will take some force from the inside of the car to
be put back into it's spot. You might need the help of something long to
push on the grommet. We used an ASP baton. You can use your hands to
push on it some more.
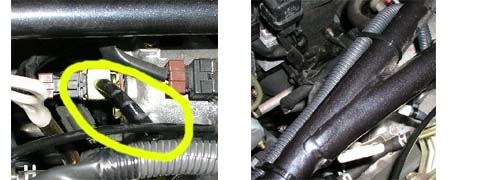
4.) Once the line is
routed into the engine bay, give yourself enough slack to be able to
connect to the FPR line. Make sure the inside has enough slack also to
be routed towards the steering column. Once vacuum line length was
confirmed and all was well, we went ahead and tapped into the
appropriate FPR line.
Cut and put your "T" into this line here. I removed the plastic coil
wrap. The line is cut in half and the "T" connected. Here's the finished
product. I went ahead and ziptied the connections and also wrapped
conduit/wire loom around the vacuum line to give it a presentable look.
The line was ziptied to the strut bar to tidy things up a bit.
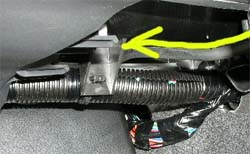
5.) That pretty much
takes care of the engine part of the install. You should be able to see
the vacuum line inside the car now. You will need to route it to the
driver's side. We routed the line from the passenger side underneath and
went where the arrow is pointing. Now mount your defi gauge in a gauge
pod and enjoy reading your boost accurately.
|

 Want
to buy this part? Read More>>
Want
to buy this part? Read More>> Did
You Enjoy Reading This Article? Read More>>
Did
You Enjoy Reading This Article? Read More>> Become
A Member Today! Access To More Articles>>
Become
A Member Today! Access To More Articles>>